Sections
Automating the Show
One of the best investments of time I’ve spent over the last few years has been automating my light shows from startup to shutdown. It’s great not having to remember to start the show each night or having to be home or wondering if I turned off the projector. I’ve also found a few ways to remotely check in on the show and even fix some problems with just my phone. This article takes a deep dive into how I’ve automated elements of my light shows and what tools I’m using to remotely manage them.
Show Schedule
Ok, so I know this might be really obvious, but setting up a schedule in your show running software is a major step for automating. Feel free to skip to the next topic.
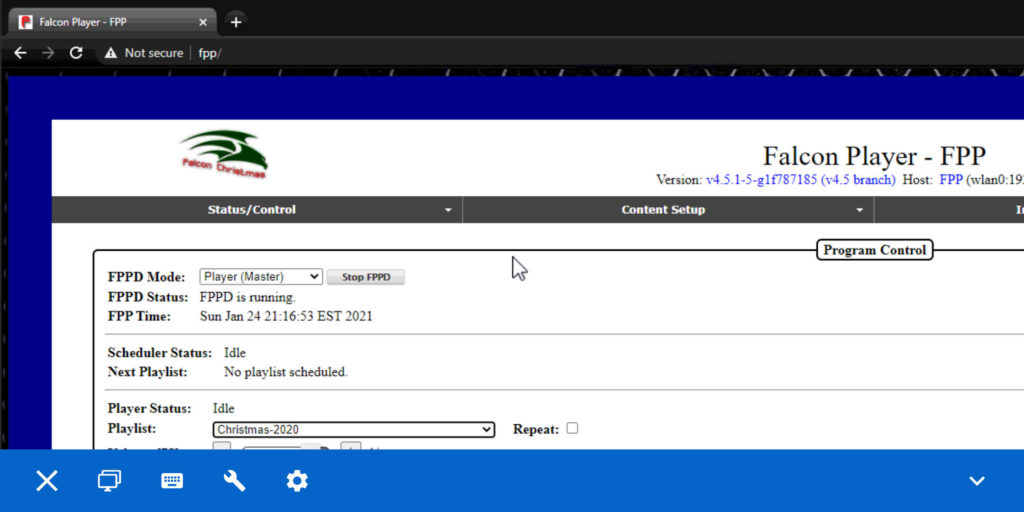
If you’ve gotten into running light shows, then you’ve likely heard of Falcon Player (FPP) as one of the best ways to run your show. If not, go check it out on FalconChristmas.com’s forums! As of 2020, I’ve been using FPP on a Raspberry Pi 4 and have built multiple complex show schedules with it.
The Halloween show ends up with the most complex schedule due to sunset moving significantly from the beginning to end of October, different end times Sunday through Thursday vs Friday & Saturday, and a special schedule for Halloween night.
| Start Date | End Date | Start Time | Sun-Thu End Time | Fri & Sat End Time |
|---|---|---|---|---|
| Oct 1st | Oct 8th | 8:00 pm | 10:00 pm | 11:00 pm |
| Oct 9th | Oct 30th | 7:30 pm | 10:00 pm | 11:00 pm |
| Oct 31st | – | 6:00 pm | 11:00 pm | 11:00 pm |
In addition to all the times to schedule above, there are 4 playlists used to get things running and keeping the lights on after the show. Here are the playlists, in order of execution:
- Playlists
- Countdown
- Start HDMI and Projector
- Main Light Show
- Afterhours Display
This can add up to a lot of entries in the scheduler and can take a bit to setup, but it’s well worth it. Here’s what my scheduler looked like after Halloween and Christmas.
There is a tremendous amount of power in the FPP scheduler and it ends up being the single most important part of automating light shows.
Countdown Script
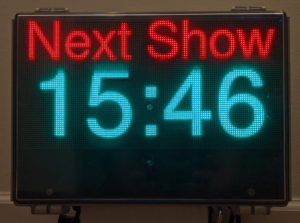
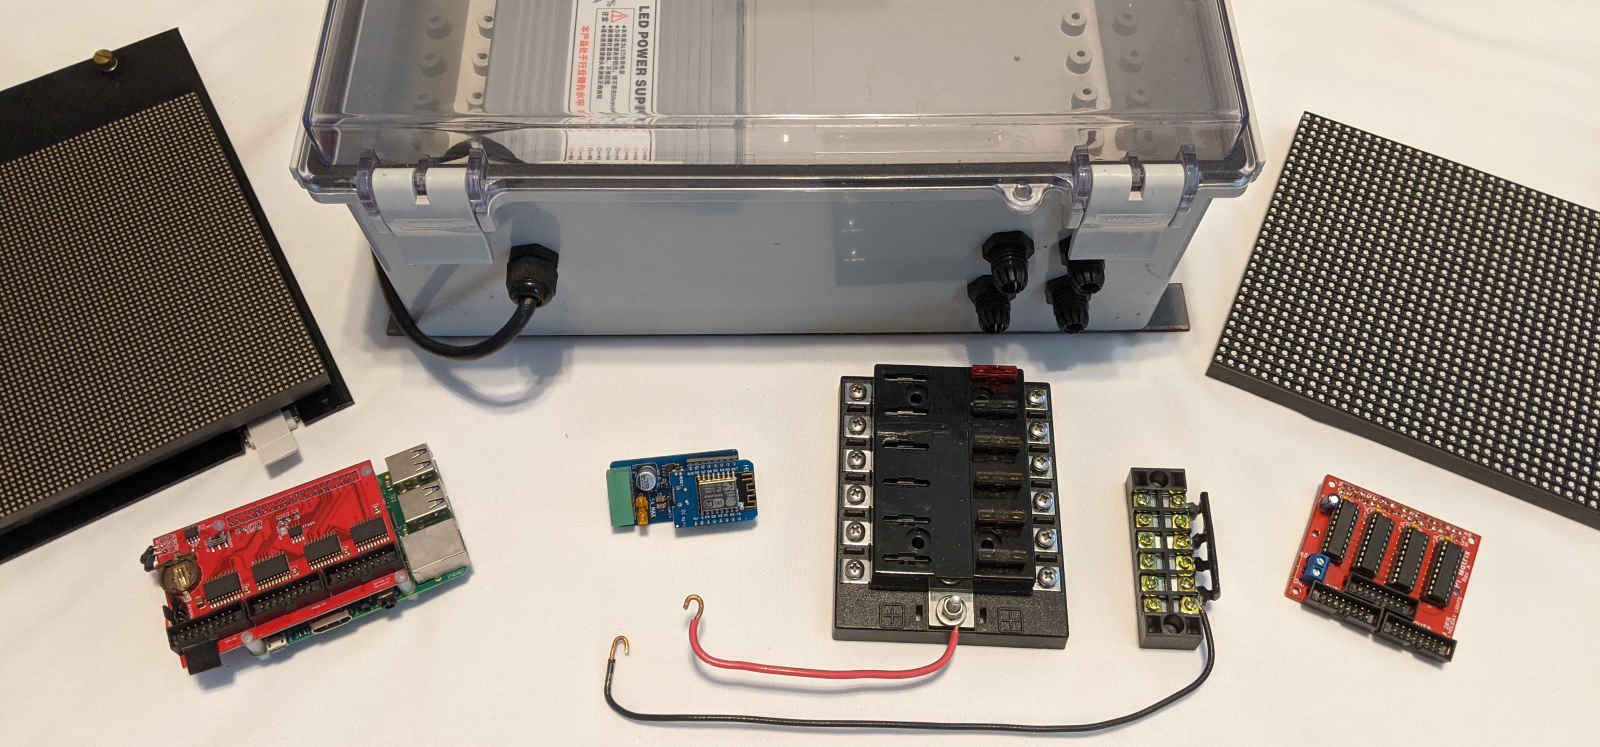
Scheduled 90 minutes before the show starts, a countdown begins on a P2.5 LED Matrix controlled by a FPP Remote running on a Raspberry Pi 3B+. Take a look at the Matrix-in-a-Box post for more info about building one. The FPP remote runs a modified version of the PixelOverlay-Countdown.php from the FPP Script Repository Browser. The script is set up in the Countdown Playlist as a FPP Command Remote Run Script entry. It is intended to only be run once until it is complete, so it is critical to set the Repeat Interval set to None when scheduling the Countdown Playlist. Without this, the script will run a bunch of times causing things to practically lockup. Sometimes you learn by experience!
Adding another playlist and associated set of schedules does take a bit to setup initially, but the pay off is great. Everything starts up as planned and you don’t have to worry about it.
As for the modified script I’m using, a copy can be found on Github at https://github.com/ShadowLight8/LightShowCode/blob/master/FPP-v3.2%2B-Countdown-Scripts/Halloween-2020-Countdown.php
Around line 42 of the script, you’ll likely want to change the 89 to 0 so the countdown will go to zero. I have a “countdown” song in my shows, so I needed the countdown to stop before reaching zero.
$diff += 89; // Add offset to line up with first song countdownProjector Control
Adding a projector can bring a wonderful video element to a show, but automatically managing that project can be pain! Most projectors have a serial port as a way to automatically control it.
The Projector Control plugin available in the FPP Plugin Manager is a great starting point. It covers a fair number of projector types and picking the type most similar is likely to have positive results. If this works for you, then you’ll be able to mostly skip the Projector Software Control section below.
Now to get a lot deeper into managing the projector, here’s what I’ve learned:
Projector Physical Setup
A big challenge was to find a cheap solution to control the projector via the serial port over wifi. I ended up using a Raspberry Pi Zero W, running as an FPP Remote, with a USB on the Go cable, connected to a USB to RS232 Adapter with FTDI Chipset, attached to the projector’s serial port. This made it easy to manage from the main FPP instance and wasn’t too expensive.
Why I went with a Raspberry Pi Zero W was due to a long HDMI cable already going from my main FPP to the projector. This let me use a less powerful Pi since it just needs to control the projector. If I got rid of the HDMI cable, then going with a Raspberry Pi 3 or better as the FPP Remote would allow me to run the video locally.
Projector Software Control
Note: These steps are based on the specific BenQ projector I have, so the serial commands, stty mode, and other things maybe different for your projector.
Managing a projector over the serial port is great for automation, however, getting it to work right can be down right difficult. Depending on your luck, it might take quite a bit to get things working smoothly.
First, locate your projector’s documentation for the serial interface. A Google search for the projector model and serial interface is your best bet. I’m using a BenQ MH530FHD 1080P Home Theater Projector and while I wasn’t able to find an exact document, this BenQ Projector RS232 Control Guide, was the closest I found. BenQ’s projector serial commands seem to be similar across their models. Some trial and error was needed to figure out the commands. In this case and to keep it simple, I only need the Power On and Power Off commands.
Second, SSH into your FPP Remote attached to the projector and try out the serial commands from command line. Using the stty command in raw mode and echo to send the commands over the USB to Serial connection I ended up with the following proj-on.sh script:
#!/bin/bash

sudo stty -F /dev/ttyUSB0 9600 raw -echo -echoe -echok -echoctl -echoke
echo -e -n '\r' > /dev/ttyUSB0
sleep 1
echo -e -n '*pow=on#\r' > /dev/ttyUSB0
The stty options keep the serial commands unaltered when they are sent to the projector. My experience was that the projector didn’t do well with random stuff on the serial port. While this ended up being a short and simple script, I struggled for many nights to find the right form of the stty and echo commands!
Third, setup a playlist on the main FPP instance to run the projector start up script on the FPP remote. Schedule this playlist to run 1 minute before the main show playlist. Don’t forget to set the Repeat Interval set to None.
I also include the Start-HDMI.sh script to make sure the HDMI output from the Raspberry Pi supplying video to the projector is turned on. It runs as a local script on my FPP main as I have a long HDMI cable that runs to the projector. If you control the projector and run video from the FPP remote, just switch to Remote Run Script.
#!/bin/sh
###########################################################
# Start-HDMI.sh - Turn on HDMI output                     #
###########################################################

/usr/bin/tvservice -p
Lastly, to shut the projector down gracefully (giving it time to cool down), the shutdown playlist uses the proj-off.sh script and the Stop-HDMI.sh script. In my case, that playlist is run as the Lead In to the Idle playlist in the scheduler. That allowed the main light show playlist to be scheduled to finish gracefully, then have the projector shutdown, and start the afterhours Idle playlist without having to manage specific times. I chose not to put the projector shut down in the Lead Out of the main show, since that makes testing the main show’s playlist hard on the projector.
Alternative projector controls
If you don’t want to deal with the serial point (and I don’t blame you), many projectors have options that could be used to manage just by power and HDMI signals. If your projector can be set to fully power on when it receives power, then a smart switch could be used for starting up. Alternatively, an option to power on when a signal is received on an HDMI input would allow startup just by running the Start-HDMI.sh script.
For powering down, use the option to shutdown after some time when there is no HDMI input. This could be done with the Stop-HDMI.sh on Github. This projector option also works as a backup plan if the serial command failed to shutdown the projector. I enabled the option to auto-power down after no signal for 15 minutes. Worth the extra step to make sure the projector doesn’t stay on all night.
Note: Most projectors need to power off gracefully to allow time to cool down. Simply dropping power from the projector may negatively impact it.
Inflatables & Static Props
Managing a few inflatables and static props was easily automated by using some smart switches. I used the Wyze Smart Home Plug (any smart switch with a schedule will work) and configured the built-in schedule to match up with the light show. Since my main FPP instance uses NTP to sync time and the smart switches also sync time, everything turns on at about the same time. You can also manually control the smart switches from the app, which can come in handy.
Remote Management
Having the ability to monitor and potentially fix issues while physically away from your show is a powerful tool and great for piece of mind.
Cameras
For a few years, I’ve used an inexpensive Wyze Cam pointed out the front window to keep an eye on the show. It does reasonably well in low light and the phone app is easy to use. The camera can also record sound so placing a radio nearby lets me check that the FM transmitter is work. For security, throw in an SD card for continuous recording as a bonus.
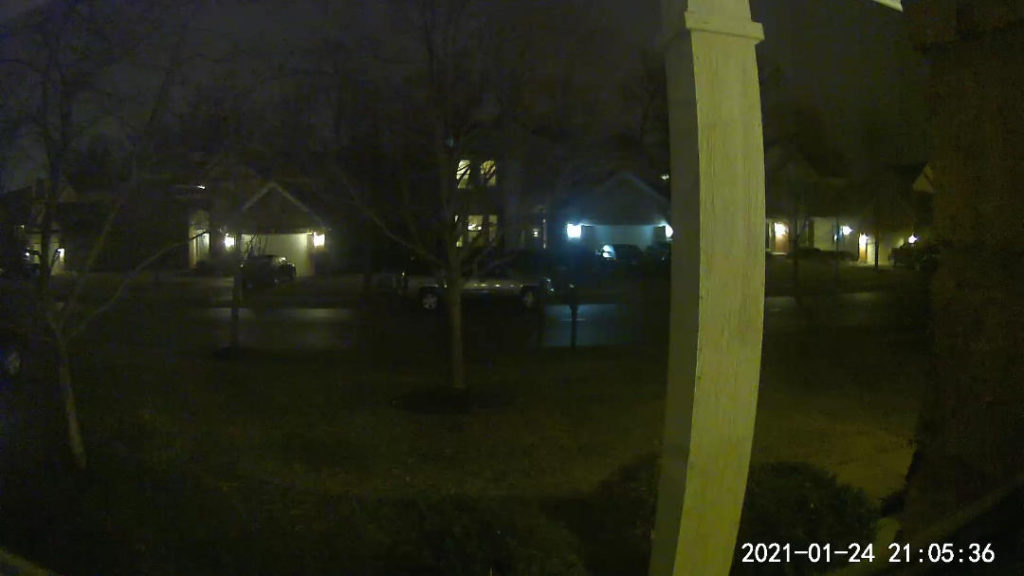
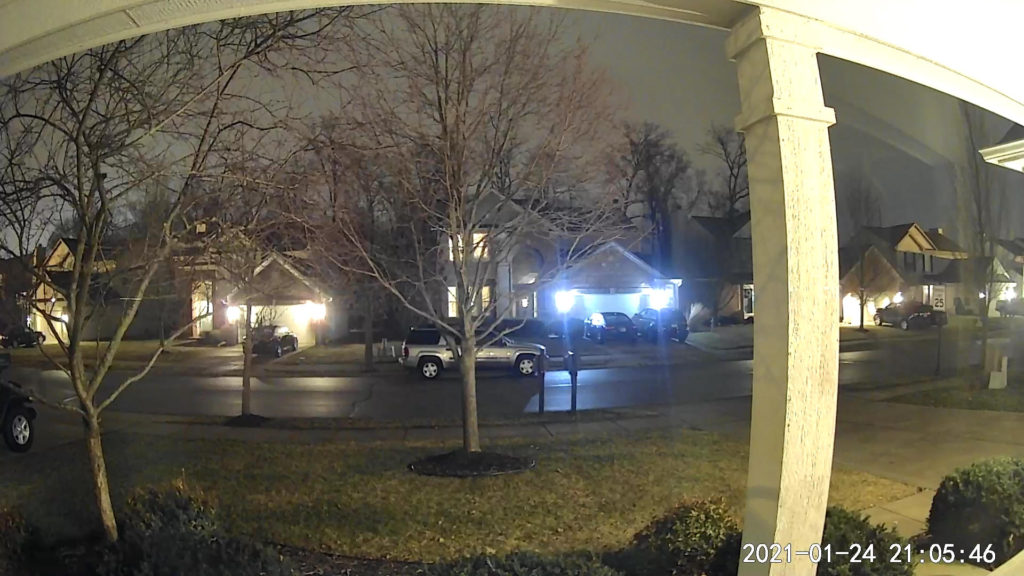
Late last year, I received my pre-ordered Wyze Cam v3 and it is a huge improvement in low light conditions and has a wider field of view. Nothing here is sponsored by Wyze, but is simply based on my experiences with their products. Here’s a comparison of the previous Wyze Cam to the new Wyze Cam v3 at night.
As of 1/25/21, the Wyze Cam v3 is out of stock, but I think it’s worth the wait for an inexpensive camera with quality low light images.
Remote Control
With a camera setup to see what’s going on with the show, the other part is setting up a few tools to deal with issues remotely. Keeping my home network as secure as possible was key, so I didn’t go down the route of opening up firewalls or NATs to enable direct access from the Internet. As I’m able to manage FPP and the various show controllers from my desktop, I went the route of setting up some remote access software on it.
After trying a few options, I decided to use TeamViewer. This allowed me to setup a remote connection to my desktop without having to reconfigure my home network and exposing it directly to the Internet. The TeamViewer app on my phone works well enough to bring up a browser and get to any of the show controller’s web interfaces to restart or deal with the problem.
One challenge within my home network was being able to get to all of the show controllers since they are on their own private network, except for the main FPP Raspberry Pi. In a future article, I’ll go into more detail about setting up and configuring a private show network.
To configure my Windows 10 desktop to directly reach any controller on the private network, an additional network route was needed. The basic setup of the network is as follow.
| Home Network | Show Network |
|---|---|
| 192.168.0.* | 192.168.4.* |
The main FPP Raspberry Pi bridges the two networks with its wifi connected to the Home Network at 192.168.0.201 and its ethernet port at 192.168.4.1. On the Windows 10 desktop, open the cmd window to add the network route:
route ADD 192.168.4.0 MASK 255.255.255.0 192.168.0.201This configures the desktop’s network to send traffic heading to addresses in the range of 192.168.4.0 to 192.168.4.255 (aka the Show Network) to the main FPP Pi at 192.168.0.201. This allows the desktop direct access to the private show network.
To get to a controller, I open a browser, head to http://192.168.4.<?>, and can reach the interface directly. This ended up being a clean solution that was convenient and limited the extra network traffic on the show network.
Remote Power Management
Sometimes a reboot is just the best answer. For issues that came up that were best solved by power cycling something, adding a few Wyze Smart Home Plug was a simple and effective solution. Adding these to the start of a few key extension cords in the garage, made it possible to power cycle a misbehaving controller.
One year, I had a wifi controller and a Raspberry Pi running as a FPP remote in a single box powered by one extension cord. The wifi controller would lock up and stop responding but could be fixed by a power cycle. I added a smart switch to the in-garage end of the extension cord. I could bring up my camera to see if things had stopped working. Then, I could use TeamViewer to connect to my desktop and shutdown the remote FPP in the box (not wanting to risk a hard power off corrupting the SD card). Next, turn off and on the smart switch and watch that both the wifi controller and FPP remote came back up.
Conclusion
I hope this deep dive into automating a show and managing it remotely inspires you with some creative solutions. In the comments below, let me know how you accomplish these things for your show.
Parts and Pieces
Links to parts and pieces mentioned in this article:


1 comment