Sections
As my show has grown, I’ve noticed on busy nights, people are getting out of their cars and walking down to the show to find the radio frequency. While my Matrix-in-a-Box is showing it most of the time, it wasn’t visible enough to the cars, and a bigger solution was needed. Having recently purchased a Creality CR-10 3D printer, I figured I could print and build a new sign.

Overall Plan
I wanted to make a Tune To sign that could easily be read from a distance, be moved around the yard, and bright enough to read but not distract from the show. The general plan was to print letters that were about 6″ / 15cm tall and mount them in a frame with some leds. I went with two rows of letters to keep the sign portable and easy to store in the off season. As always, I had to consider how to make things as weatherproof as possible.
3D Models
First up was finding the right type of 3d printable letters that could both be lit from behind and easily mounted. Heading over to Thingiverse, I eventually found these Letter Boxes by muzz64. Each letter came as two parts, which was ideal as the base could be black and the lid could be printed in white. The only problem was no numbers were included in the set. Thankfully, I found the matching Numbers and punctuation by Cameronspg. The last item was the decimal point, which the Round box with lid by ricardo_n_miguel worked perfectly for.
Importing the base models into Cura, I went with basic, quick to print settings with a 0.2mm layer height. Scaled the models up to 150% to get to the 6″ / 15cm size. This also made them deep enough to mount led lights inside. The bases were printed using some inexpensive Overture PLA matte black filament.
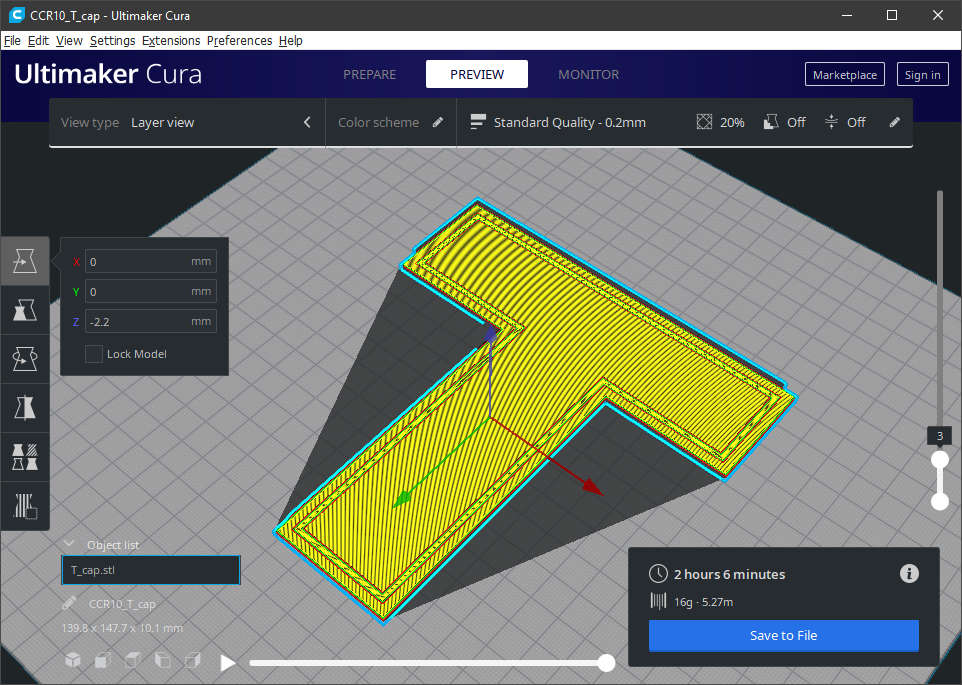
For the lids, I wanted to have the top surface be only two layers thick, while still having the full ring that fits into the base. Two top layers are enough to be solid, but still thin enough to let light through. After bringing the lid models into Cura and scaling them by 150%, I pushed the model down, using translate, by about -2.2mm. Once sliced, you can preview to confirm only two layers are going to be printed before the ring is started. The lids were printed in white Hatchbox PLA filament.
Lighting
To illuminate the letters, the plan was to keep it simple and weatherproof. A basic string of 120 indoor/outdoor warm white led Christmas lights fit the bill. I used a cheap soldering iron to melt slots into the side of each letter for the wires. It was critical to match up where the slots were between letters since the string only had ~4 inches of space between leds. With only a few inches between each led on the string, planning where to go between each letter was key. Here’s the wiring diagram that shows how I routed the wire between each letter and between rows.
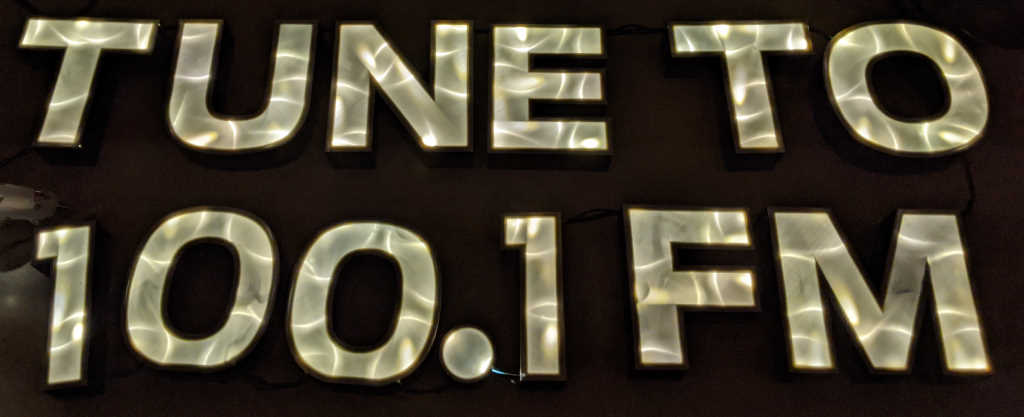
Inside each letter, hot glue was used to affix 6 to 10 leds inside. Each led was mounted horizontally, with a bit of an angle up to shine more towards the lid. Interestingly, this gave a more textured appearance than expected. The end results was the sign was bright enough to read without being too bright that it distracted from the show.
Frame
I used some extra 2″ x 2″ lumber for the frame as it was more than strong enough. Cut 4 equal length pieces a few inches longer than the width of the letters. In my case, this was 42 inches long and these will be the horizontal pieces. Cut another 4 equal length pieces about 24 inches long to be the sides/legs. Assemble the front of the sign using 3 of the longer pieces, spaced just enough for the letters, and screw the sides to the ends.
To the back side of the front, attach plastic fencing or something similar. This provide a backer for the letters to go against. I attached the plastic fencing with 1.25″ screws and fender washers.
Assemble the back of the sign using the remaining long piece and 2 remaining legs. The horizontal piece should be around 6″ from the bottom. Connect the front and back halves of the sign at the top with 3″ or 4″ gate hinges. To keep the sides from opening too far, I added short pieces of chain between the sides.
Next was installing all the letters into the frame and getting the spacing figured out. Once complete, black cable ties were used between the letters and over the wire to secure them. I also found that clear packing tape was helpful to ensure the lids stayed secure to the base of each letter. The handful of extra lights, were cable tied to the back of the sign. This worked great so I could see if the sign was on from inside the house since I could only see the back.
Automation
Using a Wyze Smart Home Plug was a painless way to add the Tune Tu sign to the show. I scheduled the switch to come on 1-2 minutes before the show. Since the Raspberry Pi 4 that runs FPP is connected to the internet, it stays time synced with NTP. The switch turns off at the end of the scheduled show. The show still runs through the rest of the playlist, but rarely have more than one car watching the last show of the night. If you’re interesting in more about automating your show check out Light Show Automation and Remote Management post.
